Sourcing & Verification
Blueprint string reproduced byte-for-byte from community submission #28 on sandustryvault.com and published verbatim. We have not re-tested it in our own save. Footprint, power draw and throughput are not published by the source, so we do not state them.
Layout Render from the Original Submission
● Source layout render 43363 char string 7 machine types
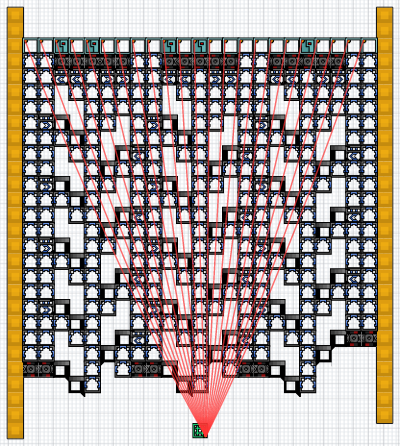
Drag to pan · Scroll to zoom · Render published with the original submission on sandustryvault.com
Layout Evidence & In-Game Captures
Machinery & Source Data
Machinery Types in the Payload
- Filter Wall Mk 2
- Conveyor Right Mk 2
- Filter Right Mk 2
- Filter Left Mk 2
- Conveyor Left Mk 2
- Signal Gate
- Signal Sensor
Community Adoption
- 14 in-game copies reported
- 43363 character string
Reported Footprint & Power
- Footprint: not published by the source
- Power draw: not published by the source
Safe Placement & Cold-Start Checklist
- Place the module in open space with 2-block perimeter clearance before connecting production lines.
- Confirm research prerequisites, conveyor speed match, and liquid drop-pipe heights.
- Leave an inspection gap so any blocked Shaker or mineral slurry overflow can be drained safely.
- Verify power grid capacity satisfies the initial startup spike before feeding raw ore.
⚠️ Known Failure Modes & Anti-Clog Safeguards
Not reproduced in our own save yet, so no failure modes are confirmed here. Check the linked original submission for any notes from the author.